What is NodeOps?
NodeOps Network is an AI-driven, chain-agnostic DePIN orchestration layer designed to provide verifiable decentralized computing services. Founded in 2023, it secured significant funding led by L1 Digital and Finality Capital. The network uses a dynamic “burn-and-mint” model tied to protocol usage: users convert $NODE into credits for computing services—burning the tokens—while providers earn revenue and the protocol mints new tokens based on economic activity. The $NODE token aligns incentives between users, providers, and protocol operations. Distribution allocates 47.5% to community/airdrop, 22.5% to early backers, 15% for incentives, and 15% for contributors, with emissions capped at 186,529 $NODE daily.User Guide (NodeOps)
Prerequisites
Before getting started, make sure you have:Compatible Wallet
- MetaMask (or another EVM-compatible wallet)
- Configured for the Arbitrum One network
$NODE Tokens
You will need approximately:- 2,605 $NODE
- 2,000 $NODE for initial provider registration
- 600 $NODE for bonding
- ~5 $NODE for bridge fees (if applicable)
ARB ETH for Gas Fees
- ~0.01–0.03 ETH on Arbitrum
- Required to pay transaction fees
Cripto Host Account
You must have an active account: 👉 https://cripto.host/💡 Note:
Cripto Host provides compatible infrastructure (≥6 vCPUs, ≥12GB RAM, ≥180GB SSD).
No hardware setup is required.
Always use official websites and never share private keys.
Step-by-Step Inbound Process
Follow the steps below. Cripto Host handles the infrastructure automatically.1. Configure Your Wallet on Arbitrum
Objective
Prepare your wallet for $NODE transactions.Install MetaMask
Download and install MetaMask: 👉 https://metamask.io/Add the Arbitrum One Network
Easy Option (Recommended)
Use Chainlist: 👉 https://chainlist.org/ Search for Arbitrum One and add it automatically.Manual Configuration
- Network Name: Arbitrum One
- RPC URL: https://arb1.arbitrum.io/rpc
- Chain ID: 42161
- Currency Symbol: ETH
- Block Explorer: https://arbiscan.io/
Add Gas Funds
Transfer ~0.01–0.03 ETH (Arbitrum network) to your wallet. You can use:- Bitget
- Kraken
- Arbitrum Bridge → https://bridge.arbitrum.io/
2. Purchase and Transfer $NODE to Arbitrum
Objective
Acquire $NODE tokens and move them to Arbitrum. Do not purchase via the NodeOps portal (it is intended for bridging/staking).Use a centralized exchange for initial purchase.
Example: Buying $NODE on KuCoin
- Create a free account at:
👉 https://www.kucoin.com/ - Deposit funds (USDT via card, bank transfer, or local methods)
- Go to the Spot Market
Search for NODE/USDT - Purchase approximately 2,605 $NODE
- Withdraw tokens to your MetaMask:
- Select Arbitrum network
- Paste your wallet address
- Confirm withdrawal
If Bridging Is Required
If you purchased on Ethereum or BSC:- Go to:
👉 https://portal.nodeops.network/ - Connect your wallet
- Select Bridge
- Choose:
- Token: $NODE
- Amount: ~2,605
- Destination: Arbitrum
Verify Balance
Check your balance on: 👉 https://arbiscan.io/ If $NODE does not appear in MetaMask, manually add the token contract from: 👉 https://coinmarketcap.com/currencies/nodeops/ Consider purchasing a few extra tokens to account for fee variations.3. Connect to the NodeOps Dashboard
Objective
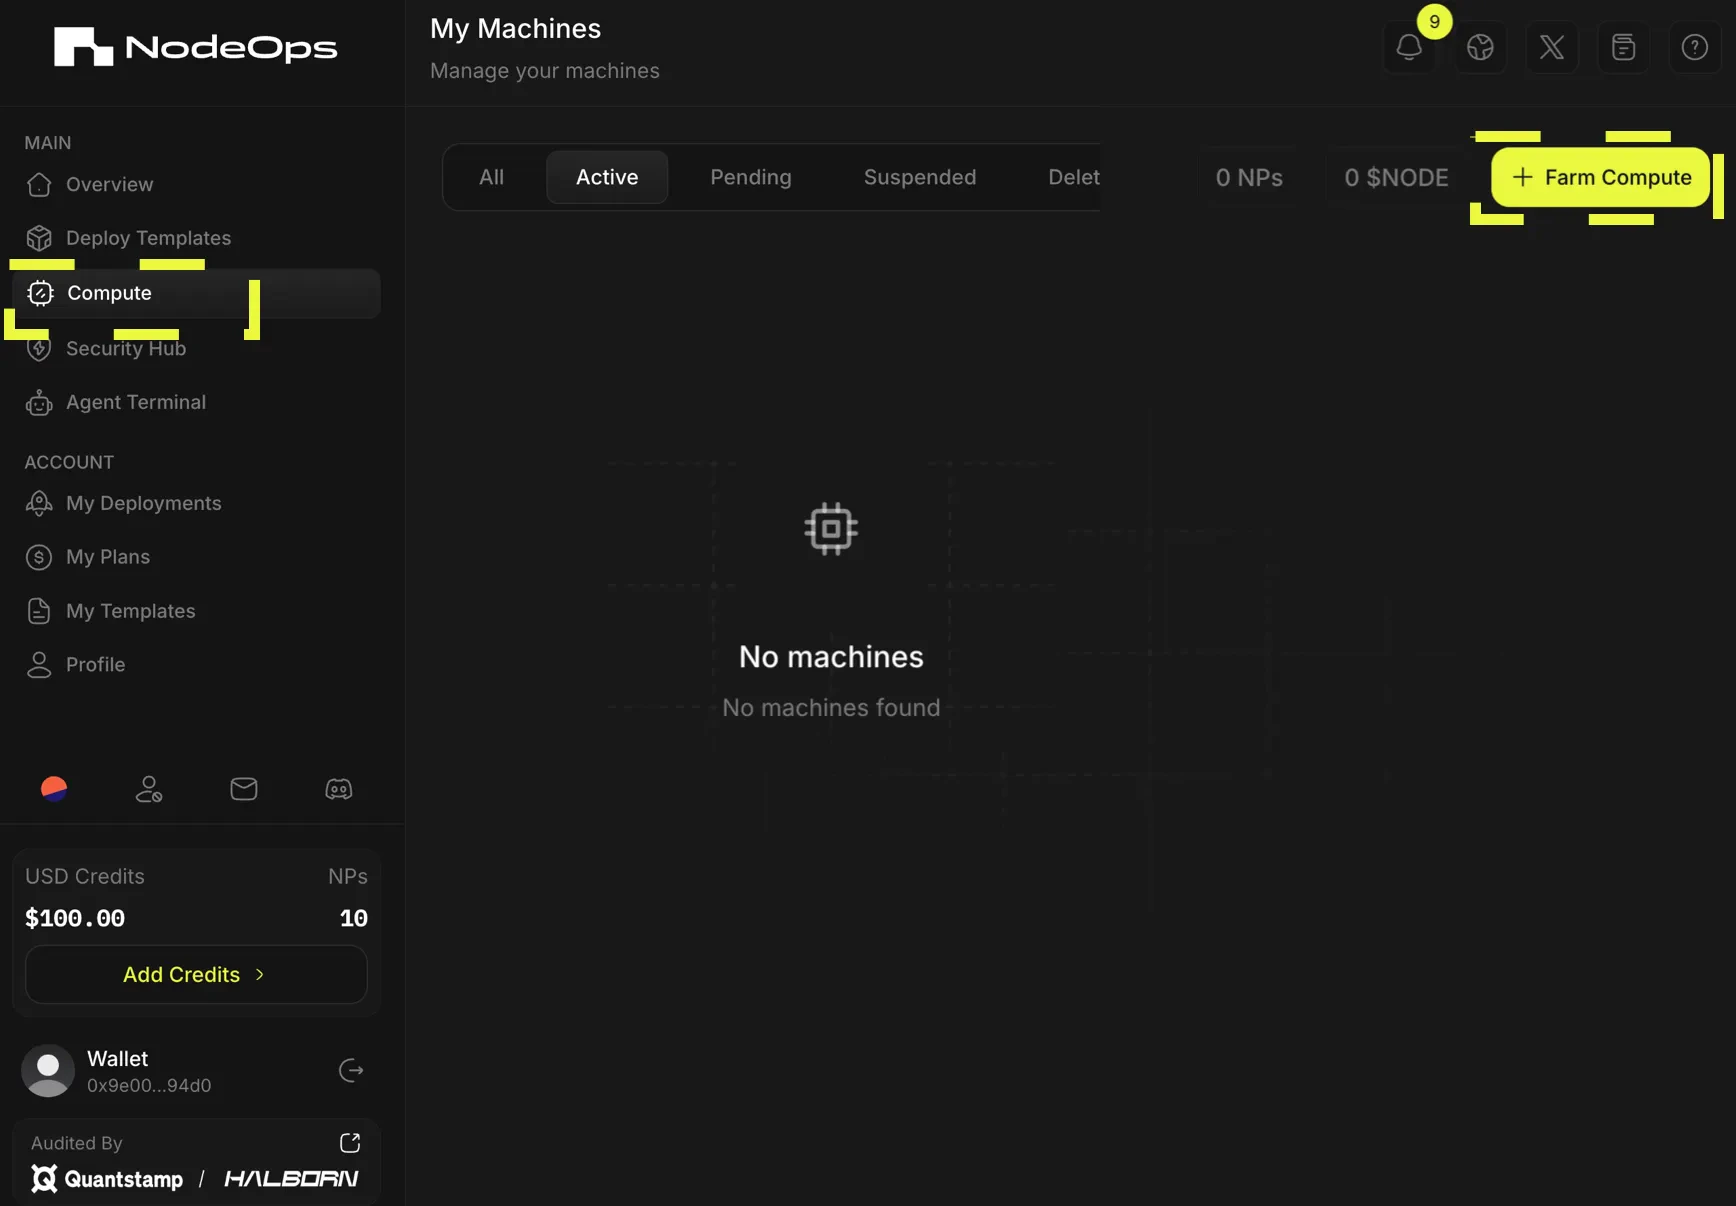
Bond tokens and register as a provider.Access the Dashboard
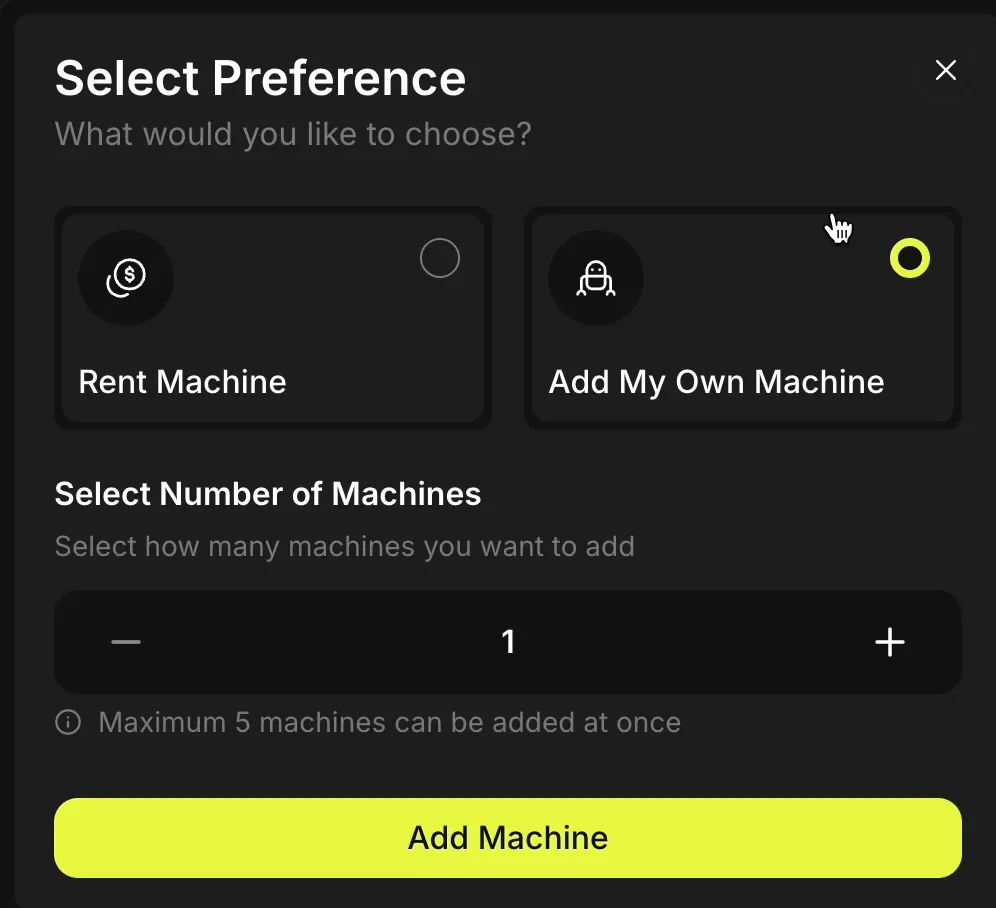
👉 https://cloud.nodeops.network/ Click “Connect Wallet” and connect your wallet (Arbitrum network).Register as Provider
Navigate through:+ Farm Compute → Add My Own Machine → Become Provider
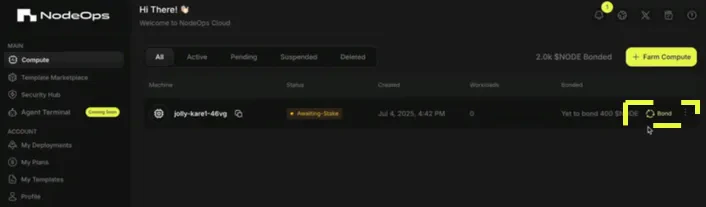
Bond 2,000 $NODE (Initial Activation)
Bond 2,000 $NODE to activate your provider status. This transaction officially registers you as a Compute Provider on NodeOps. After confirmation, the dashboard will show: “2.0k $NODE Bonded”
Copy the Setup Provider Code
Click “Setup” Copy the generated Setup Provider code. You will use this code inside Cripto Host.4. Configure the Node in Cripto Host
Objective
Provide the required information so Cripto Host can automate deployment.Access Node Settings
Inside your Cripto Host dashboard, open: NodeOps → Node SettingsFill in the Required Fields
EVM Wallet Public Key (Burn Wallet)
Your wallet public address (example:0x1234...abcd)Copied from MetaMask.
P2P Setup Code
Paste the Setup Provider code generated in the NodeOps dashboard.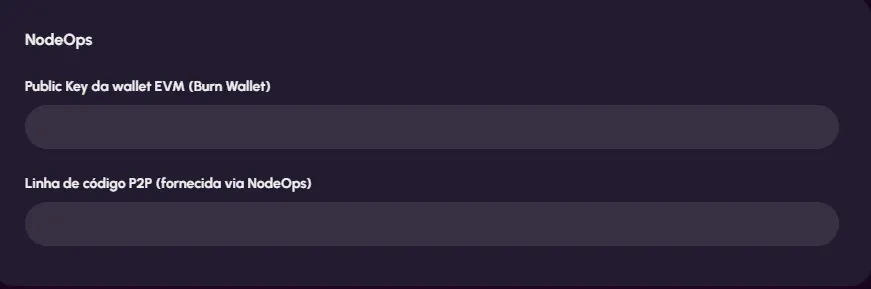
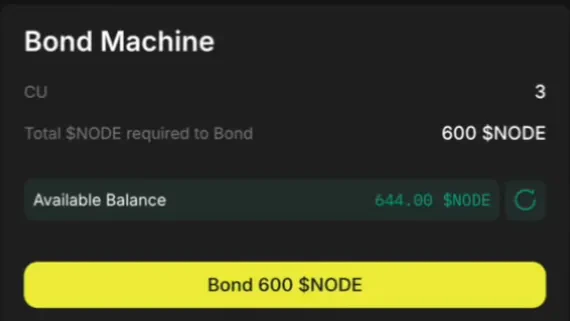
5. Final $NODE Bond on NodeOps Dashboard
Return to: 👉 https://cloud.nodeops.network/ With your wallet connected:- Click “Bond”
- Add the remaining 600 $NODE
- Confirm transaction in your wallet
Activation Status
Your machine status will change:CONFIGURING → ACTIVE
Once active, your node is fully operational.

What Happens Next?
- ✅ Cripto Host monitors your node 24/7
- ✅ ≥99% uptime with SLA compliance
- ✅ Dashboard displays accumulated rewards
- ✅ Alerts if attention is required (e.g., downtime)
Useful Links
- NodeOps Documentation — https://docs.nodeops.network/
- NodeOps Dashboard — https://cloud.nodeops.network/
- MetaMask — https://metamask.io/
- $NODE (CoinMarketCap) — https://coinmarketcap.com/currencies/nodeops/